

Exclude your own visits
Stop tracking your own visits in Swetrix. Exclude your IP address in project settings or use a cookie to disable analytics in your browser.
You can keep your own visits, testing, and internal traffic out of your Swetrix statistics in two ways:
- Block your IP address in project settings. This requires no changes to your website and excludes everyone using that public IP address.
- Set an exclusion cookie in your browser after updating your tracking script. This excludes that browser, even when you change networks.
Both methods apply to future visits. They do not remove data that has already been collected.
Exclude your IP address
- Open the free Swetrix IP lookup tool from the network you want to exclude and copy your public IP address.
- Open your website's Project Settings.
- Select Shields under Protection.
- Add your IP address to Blocked IP addresses. Press Enter or a comma to add it to the list, then wait for the save confirmation. Changes save automatically.
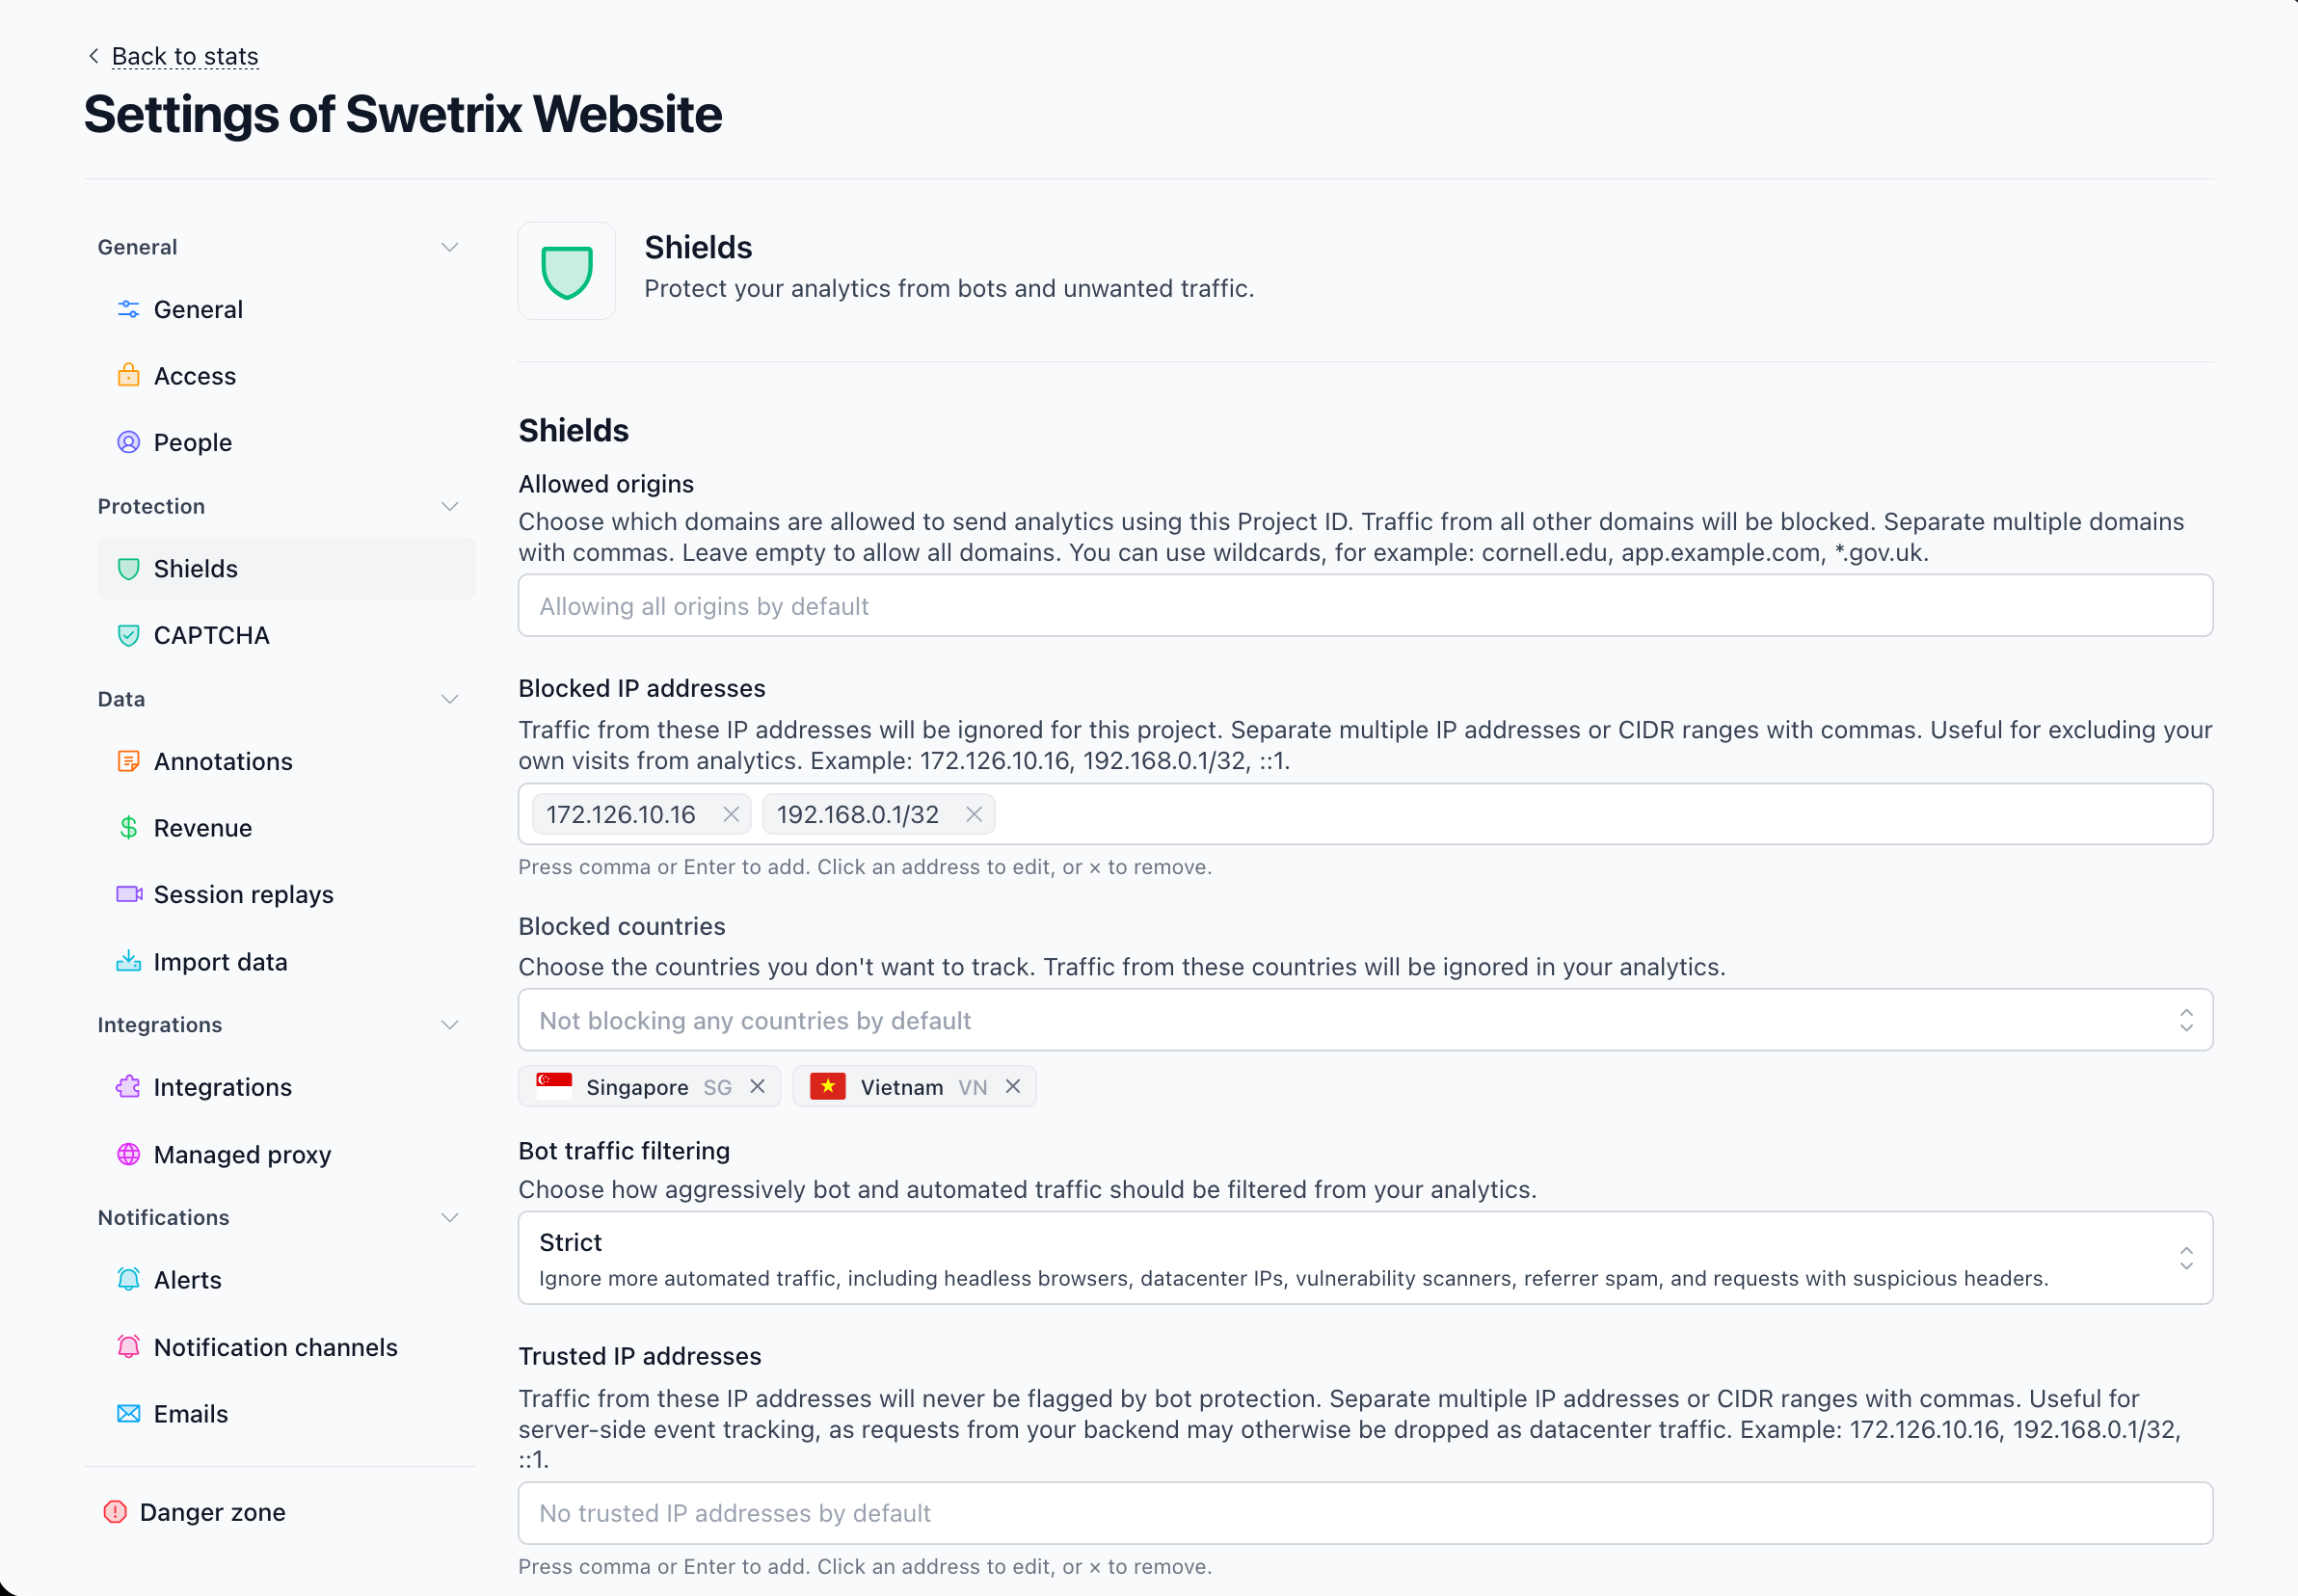
You can add multiple IP addresses or CIDR ranges, separated by commas. IPv4 and IPv6 are supported. Repeat this for each project where you want to exclude your visits.
Use the public address shown by the lookup tool, rather than a local address such as 192.168.0.1. If your connection uses both IPv4 and IPv6, you may need to add both public addresses.
Blocking a public IP address also excludes other people who share it, such as colleagues on your office network. If your IP changes, or you switch networks or VPNs, update the blocked list. Use the cookie method below if you only want to exclude your own browser.
To include your visits again, remove your address using the × beside it and wait for the save confirmation.
Exclude only your browser with a cookie
This method needs a small change to your website's tracking script. The cookie is a marker that your script checks; setting it alone does not disable Swetrix.
1. Update your tracking script
Update your existing swetrix.init() call to pass the disabled option:
swetrix.init("YOUR_PROJECT_ID", {
  disabled: document.cookie.split(";").some((cookie) => cookie.trim() === "exclude_analytics=1"),
});
swetrix.trackViews();
Replace YOUR_PROJECT_ID with your project's ID and keep any other options from your existing installation. Make this change in your original initialisation call, before tracking starts. Adding a second init() call will not update an already initialised tracker.
The example uses the browser script's swetrix global. If you use the npm package, pass the same option to the init() function you already import. See the installation guide for both installation methods.
2. Set the cookie on your website
Visit your own website, open your browser's developer tools, and run this in the Console:
document.cookie = "exclude_analytics=1; path=/; max-age=31536000; SameSite=Lax";Then reload the page. The tracker reads the cookie during initialisation and disables tracking when its value is 1.
You can also use a cookie editor extension or your browser's developer tools to create the cookie manually:
- Name:
exclude_analytics - Value:
1 - Path:
/ - Domain: your website's hostname
The console snippet sets the cookie for one year on the current hostname. It applies only to that browser profile. Set it separately for other browsers, devices, or subdomains you use. Clearing cookies, opening a private browsing window, or letting the cookie expire means your visits can be tracked again.
3. Re-enable tracking
To remove the cookie created by the snippet, run this on the same website and reload:
document.cookie = "exclude_analytics=; path=/; max-age=0; SameSite=Lax";If you created the cookie manually with a different domain or path, delete that cookie using the same cookie editor.
Check that your visits are excluded
After saving your IP block or setting the cookie and reloading, open a page on your website and check your project's live visitors or recent sessions. Your new visit should not appear. Visits recorded before the change may still be visible.
If you still see your visits:
- For IP blocking: check your current public IP again, confirm it is in the correct project's blocked list, and account for any VPN, network change, or IPv6 connection.
- For the cookie: confirm it is set on your website, its value is exactly
1, and the deployed tracking script checks it in the firstinit()call. Reload after making changes.
The cookie method controls the JavaScript tracker in that browser. It does not exclude events sent independently by your backend or the <noscript> tracking pixel when JavaScript is disabled. Use IP blocking or apply an exclusion in your server-side integration for those cases.

Help us improve Swetrix
Was this page helpful to you?
Project Configuration & Security
Manage your Swetrix project settings, allowed domains, shields, and security options to control how website traffic is collected.
Bot Protection
Configure Swetrix bot protection, review blocked traffic, and allow trusted IP addresses to keep automated visits out of your analytics.